Showing posts with label Appetizers. Show all posts

Sunday, May 27, 2012

Grilled Artichokes, Herbed Lemon Aioli Dipping Sauce, and The Most Random Week Ever

Is everyone enjoying their long weekend?  You better be.  It's a beautiful day here in sunny Arizona... mid 80's.  We always hang on tight to these last few days before the constant streak of triple-digit days hits.  I've been here for over ten years now.  At this point, I'm fine up to 108 degrees.  It really doesn't bother me and it's not unusual to find a lot of us wearing jeans or full black suits in that weather.  But let me tell you, when you walk outside at midnight and it is still 102?  That's just effed up.  True story.

On our theme of hot weather meals, let's do an appetizer.  Grilled artichokes with a lemony garlicky dipping sauce.    If you have never handled a fresh artichoke before, it can be a little scary.  It's thorny, it has something they actually call a "choke" in it because it will attempt to choke you to death, and it just looks kind of weird.  BUT.  Don't be afraid.  It's actually pretty easy.

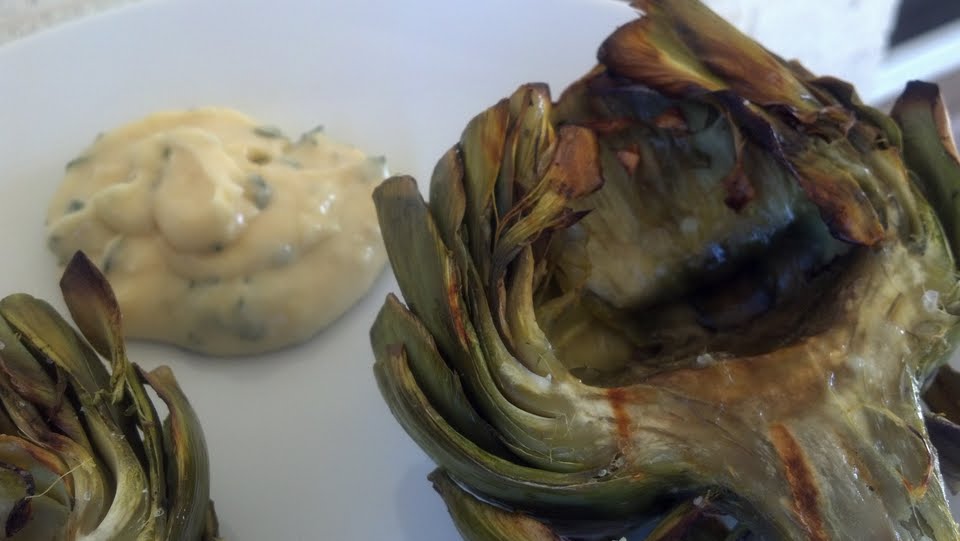
Grilled artichoke hearts
Prepping an artichoke:

Put about two inches worth of water on to boil.

Using a very sharp knife, cut off the top two inches of the artichoke, where it comes to a point.  Then, using a scissors, go around the outside of the artichoke and snip off the very ends of the leaves to remove the sharp pointy part.

Throw the artichoke in the boiling water and let it steam for 15 minutes to get it softened up.

Now we will put together the dipping sauce...

What you need for the dip:

2 tablespoons of mayo
2 tablespoons of dijon mustard
1 clove of garlic, minced
1 big squeeze of lemon
1 teaspoon of so of fresh thyme
Salt and pepper to taste

Mix all of the above together in a small bowl and store in the refrigerator while we finish up.

Mayo, dijon, garlic, lemon, and fresh thyme

Right now.  Yes, NOW.  Go turn on the grill.

When the 15 minutes is up on the steaming, very carefully remove the artichoke to a cutting board.  Let it cool down for a couple of minutes or you can be impatient like I am and use a dishtowel to hold onto it for the next part.

In a bowl, mix together 2 tablespoons of olive oil and a squeeze of lemon and set aside.

Using a large knife, cut the artichoke in half, length-wise.  When you open it up, you will see this weird shit inside that looks kind of like hair or very fine straw.  YOU GOTTA GET RID OF THAT CRAP. Using a spoon, start scooping it out and throwing it away.  You need to get all of the "hair," which is actually called the "choke" out of there.  Scrape against the bottom of the artichoke pretty firmly to get it all and then curse when it goes flying across the room.  You can also scrape out the little tiny interior leaves that are attached to it at the same time.  You are done when it looks hollowed out and there is no more "hairy shit" inside it.

Brush the artichoke on all sides with the olive oil and lemon juice mixture.  Sprinkle with a little salt and pepper.

Time to grill.  Finally.  Put the artichoke on a medium heat grill, cut side UP, for ten minutes.  Flip the halves over and grill another 5 minutes.

Pretty

Serve with your dip as a light appetizer.  I'd say one artichoke probably serves about 2 people depending on the size.  

Nutritional Info:  The artichoke is practically a freebie.  The entire quantity of the dip is about 300 calories and this makes enough dip for 4 artichokes.

*****

The over-arching list of what I have to do this week looks like it belongs to a schizophrenic.  Everything from handling a hearing in a homicide case to making meatballs for Good Doggy Gourmet to doing a wedding reception for 50 to Gaga only knows what.  It should be an interesting week!

By the way, not to self-promote too much... But if you are in need of a good knife or knife set, you can help your pal Jules out by ordering off my website.  Pretty please?    


Thursday, May 10, 2012

Bruschetta, Slobbery Success, and Craft Projects

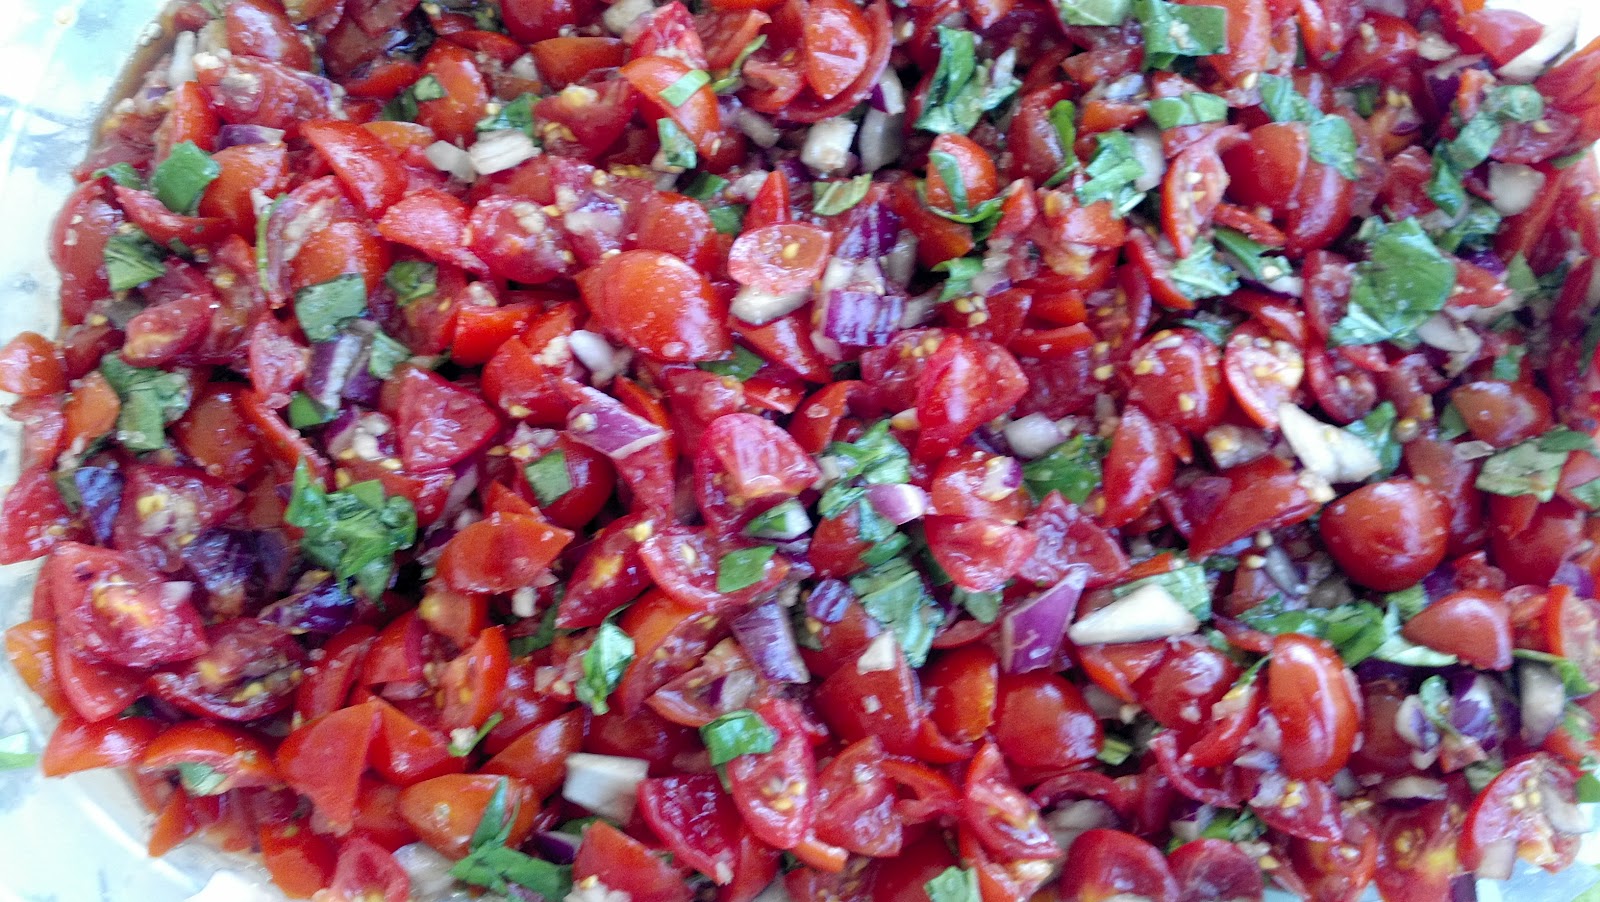
Today I scored almost ten pounds of cherry tomatoes from my friend Shannon's garden.  ((Oh the stories we have on each other.  Holy shit.  We could blackmail each other for the the rest of our lives.))  Do you have any idea how many tomatoes that is?  Like a million and twelve.  More or less.  They seemed perfectly suited to making a huge vat of bruschetta topping for a party tomorrow...


What you need:

A crapload of cherry tomatoes ((or maybe like 4 cups worth))
1 small to medium red onion
2 cloves of garlic
1-2 handfuls of fresh basil
2 tablespoons EVOO
4 tablespoons balsamic vinegar
Sea salt
A loaf of Italian bread or pre-made crostinis

What you do:

After thoroughly washing everything, commence the tedious process of chopping the cherry tomatoes.  I was cutting each into 8 pieces.  ((Yes, it took until twelve minutes after forever.))  Dice them up as finely as you have patience for.  Don't freak about the seeds.  A lot will come out as you cut them, but no big deal.

Chop the red onion finely, mince the garlic, and cut the basil into strips.  Take a minute to recognize how fracking deee-lightful fresh basil smells.  

Throw everything into a large storage container.  Add the olive oil, the balsamic, and give it a couple of cracks of sea salt.  ((Now, I love me some balsamic.  Actually, any vinegar, but balsamic in particular.  Accordingly, I put a lot on.  You can use less.  In fact, you can adjust anything you want!  It's basically a free country unless you are a woman, a minority, a non-heterosexual, have a disability, or are just generally kind of weird.  Anyway.))  Toss it all together and then cover tightly and refrigerate overnight for the flavors to get all lovey dovey together.

When you are ready to serve, smear a couple of spoonfuls on top of sliced Italian bread.  Throw them under the broiler for a couple minutes.  You can also buy pre-made crostini thingies.  I also think this would be good on grilled chicken, a salad, or really most anything.  See previous comment regarding the freeness of this country.  I don't think "freeness" is a word.  Again, refer back to previous statement.

Nutritional Info:  This is basically a freebie...  2 tablespoons ((without bread)) would only be about 60 calories.  Go wild.


*****

As I mentioned yesterday, I delivered the Slobberloaf packages yesterday.  Dog #1 went insane and then proceeded to spit all the dry kibble out and follow me around the house until I left.  Dog #2 ((who is toothless)) loved it and took some out of my hand as I was crumbling it into his bowl.  Dog #3 wrote me a love letter on Facebook.  I have another 6 pounds cooking right now and I cannot get my dog to quit staring at the oven.  I actually think this batch will be better because I used a slightly fattier type of ground beef.  Once it cools, I'm going to figure out how to package it and get it delivered for sale tomorrow!  

*****

I have an assignment for you.  You need to make these:


Yes, that would be a mason jar super-glued to a candle stand.  BRILLIANT.  I shall be scouring Goodwill stores for candle stands in my free time.

Monday, April 30, 2012

Shrimp Salsa for Cinco de Mayo

I've made the executive decision that this week is going to be a Mexican food fest in honor of Cinco de Mayo.  Cinco de Mayo is, well, the 5th of May in case that isn't obvious to you.  I'm not judging.  I'm blonde.  I couldn't figure out how to double 2/3 of a cup the other day.  Anyway, I'm going to be giving you some mainly healthier alternatives, but you know damn well at some point there is going to be some cheese-laden something or other pile of goodness...  All things in moderation.

Let's begin at the beginning.  Salsa.  Well, that sounds kind of boring.  How about shrimp salsa?  The idea for this came via Pinterest, but I modified it so that it is basically my pico de gallo with shrimp added in.

Salsa con Camarones
What you need:
1 lb of cooked large shrimp, de-veined and de-tailed
5 roma tomatoes
1/2 red onion
1 clove of garlic, minced
1 jalapeno pepper
1 handful of cilantro
1 lime
Sea salt

What to do:

Start by dicing the shrimp as finely as you can.  Double check that  all of the tails are completely removed and there aren't any mystery shell remnants hanging around.

Move on to the tomatoes and de-seed them. ((Seeds in tomatoes are typically kind of bitter... it will taste better if you get them out.))  You can do this quite efficiently by cutting the tomato into quarters, and then just scraping out the seeds.  If you miss some, you miss some.  Not the end of the world.  Chop the tomato quite finely.

Chop your onion, mince the garlic, and cut up the jalapeno.  Jalapenos in and of themselves are not that hot.  It is the seeds that hold the heat.  Depending on who I'm making it for, I leave varying amounts of seeds in.  ((Arizona natives can take it and will say the hotter the better.  Upper midwest transplants tend to be pretty wimpy and can't seem to handle it.))  Chop up the cilantro, give the lime a good squeeze, and crack some salt over the top.

Stir it all together and place in an airtight container in the refrigerator.  Keep in mind that at this point, none of the flavors have had a chance to mingle so this is not really what your finished product is going to taste like.  After it has had at least a couple of hours in the refrigerator, but preferably overnight, stir it again and sample.  At this point you can add more of whatever you may think it needs.  I generally tend to add another squeeze of lime and some more salt.  Or maybe I'm thinking of tequila...

This will serve somewhere between 8-10 people.  If you are going to have it at a potluck or a cookout, be very aware that seafood is not so happy when it sits outside or even inside for very long.  I would recommend at the very least, putting it on ice and just throw the damn stuff out after a couple of hours.  I don't want any of y'all to get food poisoning, blame me, and tell everyone how I tried to kill you.

Nutritional Info:  Basically free!  This is very low cal and has no fat.  Enjoy with reckless abandon.

*****

Other Mexican goodies can be found under the label of "Mexican" which you should be able to search on the side bar.


Sunday, April 29, 2012

Seven Layer Dip Roll-Ups, Free Stuff, and Baby Tigers

It has been a super busy weekend in JuliaWorld as you may have guessed.  The highlights include cooking for a 40th birthday party for about 30 Friday evening, being a massive failure on the 3d Annual Food Bloggers Bake Sale ((gah)), a free 90-minute massage, and an evening on the patio with a couple of bottles of wine and better company.

The menu for the birthday party was basically whatever the birthday boy wants, the birthday boy gets.  I ended up with quite an unusual assortment which actually turned out well because that way there was something for everyone.  One of the items was tortilla roll-ups.  I remember my mother making these and so I had emailed her for the recipe a while back.  Her reply was something to the effect of "I thought they sucked so I threw it out."   Luckily we have Pinterest to the rescue for the basic proportions.

Some rolls are more triangular, some are more rectangular...

What you need:
16 ounces of sour cream ((I used low fat))
8 ounces of cream cheese, softened ((again, I used low fat))
16 flour tortillas ((I used high-fat...  meaning the most authentic ones I could find))
1 bunch of green onions
1 small can of diced black olives
1 cup of shredded Mexican cheese
1 packet of taco seasoning

What to do:

Start by mixing together the sour cream and the cream cheese.  If you are a moron like I am, you will realize you don't have time to soften the cream cheese and will instead resort to using your immersion blender to finish mixing it after saying, "goddammit you fothermucker, stir!"

Add in the taco seasoning and then the green onions, olives, and cheese.  Give it all a healthy stir until it is well combined.

Lay out your tortilla on a piece of waxed paper.  Spread the mixture across it evenly, avoiding the edges on 2 sides.

Picture by Blooming on Bainbridge
She didn't avoid the edges...
Roll it as tightly as you can and then wrap the entire "tube" in waxed paper.  Place into a large tupperware container with the seam side down.

Again from Blooming on Bainbridge
Refrigerate for at least a couple of hours if not overnight.  Just prior to serving, slice them into pieces.  At this point, you will understand why I said to avoid the edges...  Because of the round shape of the tortillas, the edges do not have as many layers and so the filling just falls right out.  I just cut these off first and then usually snack on them while I'm putting the rest of them together.

((If you have leftover filling, it is really good on chips too.))

Nutritional Info:  For about 4 slices, we can call it about 150 calories.  Anyone who actually manages to only eat four slices though is suspect in my book.

*****

Here is a glimpse into how odd things are around here...  This is what came in yesterday's mail.


That would be a FREE ((my favorite word)) 12-inch pan and a picture of a baby tiger being bottle fed.  I swear, there is never a dull moment.  But if you want to help me get more FREE stuff and make me eternally grateful, you can do so by placing an order here.  However, it will not come with pictures of baby tigers.  Well, I highly doubt it.  If that is really helpful in my quest for more free stuff, I'll send you all pictures of baby tigers.


Sunday, April 1, 2012

Baked Brie Bites, Smushers, and a Publisher's Nightmare

Last night, I gave my first real cooking lesson--  A friend had approached me a couple of weeks ago and said, "Can I pay you to teach me how to make something?  Like anything?  I can usually boil water without a problem, but that's about it.  Do you do that?"  After about a millisecond, I was like, "OF COURSE!!  I totally do that as of right this second!"  I came up with a menu, sent her the shopping list, then had to send pictures of anything that didn't come in a can, and we got after it.  We made baked brie bites, lemon-butter chicken with proscuitto and artichoke hearts, rice, roasted asparagus, and apple oatmeal crisp.  It was really entertaining for both of us AND at the end she said she felt totally confident she could repeat the meal on her own.  Success!

The Baked Brie Bites came from an idea I saw on Pinterest and then completely changed up because I couldn't figure where I initially saw it and had to rely on my memory.  Argh.  I think what I saw called for phyllo dough, but I'm apparently not very reliable on this and in fact, maybe I dreamt it.  Oops.  Never mind, let's just do it my way.  To hell with Pinterest anyway.    

Fancy, fancy, fancy
 You need:

A package of wonton wrappers ((my new favorite thing which can be found in the produce area of the supermarket, usually by the organics for reasons I don't understand))
EVOO ((extra virgin olive oil))
A wedge of brie
1/2 cup of brown sugar
*Some* honey
Pears for garnish

What you do:

Preheat the oven to 350.

Take the wonton wrappers and very lightly brush them with olive oil on one side.  Put them into a mini muffin tin which you have lightly sprayed with cooking spray and smush them down in to make little cups.  I actually have a smusher-type gadget that I didn't realize was a smusher.  I thought it was a pestle.  Oopsiedoodle.  You don't need a smusher.  You can smush them with your fingers.  Smusher.  ((<---Making up words is fun.))

Add about a tablespoon of brie to each of the cups.  ((We under-filled ours...  You will want to fill it basically to the top.))  Sprinkle a little bit of brown sugar over each one.  Finish it with a drizzle of honey.

Bake for about 8 minutes until the edges are golden brown and remove to a cooling rack for a couple of minutes, then serve immediately.

((As we were doing this and I'm sort of meandering through my pantry halfway talking to myself, she says, "Do you know what you're doing?"  Um, no?  "So you are making this up right now?"  Yeah, basically!))

We garnished it with little slivers of pear to be extra fancy and gourmet-y.

*****

From the "I'm apparently not a total idiot file," I *just now* discovered that I can upload pictures without going through the huge rigamarole that I have been.  It's like one button.  Holy shit, maybe I'm getting smarter.  It's about time.  Nah, doubtful.  I actually did it by accident and then somehow figured out how to repeat it.

I'll be back in a few to recap what has now been deemed THE BEST F*CKING CHICKEN EVER!  No, really.  That's its official name.  If I'm serious about actually publishing a cookbook, some editor is going to have one helluva time with me.  I'm still pissed, but totally not really, that the title 101 Desserts to Get You Laid is taken.  Sigh.


Friday, March 30, 2012

Appetizers, Artists, and Assembly Lines

I've been quiet for the past couple of days ((well, here at least, I'm actually never *that* quiet)) because I was getting ready for the event at the gallery last night.  It went really well-  I suspect there were upwards of 200 people who came through the show.  Here is the menu: fruit platter with a cream cheese/marshmallow dip, veggie platter with a dill dip, bourbon-soaked grapes with walnut goat cheese, salted cucumber slices with a Mediterranean feta spread, Caprese salad skewers, a brie platter with baby heirloom tomatoes and kalamata olives, and garlicky parmesan spinach and artichoke dip with baguette slices and crackers.

I enlisted the help of one of my dear friends the day prior because this project entailed a LOT of chopping and assembly.  The word "lot" in all capital letters doesn't even begin to cover it.  This was definitely labor-intensive, but it turned out awesome.  Here's the full array:


To the far right of those pictures is the bourbon grapes.  This actually a fairly easy project ((in most regards)) and was probably the most popular item.  I got this idea off of Pinterest ((be my friend there!  User name is Julia Steele.))


As I was assembling these, I renamed them Jules' effed up cake pops...


Ingredients:

Bourbon ((as cheap as you can get))
Grapes
Goat cheese
Walnuts

((I haven't included proportions, because this really varies...  Get one package of each and keep going until the goat cheese is gone.  If you have leftovers of the others, you can use them for something else.))

All you do is wash and remove the grapes from the stems and place them in a good sized piece of tupperware.  Pour the bourbon over until all of them are submerged.  Use the cheapest, and likely most disgusting, bottle you can find.  It had better be plastic and it should probably be dusty.  I bought a handle for something like four dollars!  ((I'm going to use the leftovers to strip some paint later.))  Be sure to seal it tightly and then let them marinate for at least six hours, but as long as two days.  ((You may want to use red grapes for this.  I used green and I was afraid they were going to turn color with the alcohol.  There was just a tinge at the point where the stem had been removed.  Totally fine, but red/purple might be prettier.  Just saying.))

To make the cheese balls, first deal with the walnuts.  You can crush them by putting them in a baggie and then taking a rolling pin to it or in my personal favorite way, by stomping on them and maybe re-enacting a dance routine you made up to a Tiffany song in the 6th grade.  You can then toast them lightly by placing them in a small pan over a medium-high heat for 4-5 minutes.  ((You can also buy them pre-toasted at Trader Joe's and probably other places too.))

Start rolling up the goat cheese.  Roll it between you palms to make small balls.  ((Ours were pretty small, mainly because we were trying to stretch the cheese and get as many skewers as possible.))  Then roll the ball in your crushed up walnuts and smash them in a little bit so they don't all fall right back off.  This is going to be messy, consider yourself warned.

If you attempt to skewer them right now, you will discover that goat cheese does NOT cooperate with skewering.  It falls right apart.  I ended up putting them in the freezer for about 3 hours to get them skewerable ((<---not a word.))  If you attempt to skewer them immediately after removing them from the freezer, you will also find them to not be skewerable and you might stab yourself with the skewer.  However, they soften up FAST.  Within ten minutes they should be a decent consistency where you can insert the top of the skewer into them.  As pictured, I layered two of the grapes with one cheese ball.  Keep them refrigerated until you are ready to serve them.  I actually put the entire tray back in the freezer for about two hours.  The grapes didn't freeze due to the booze in them, but they were nice and cold when I put them out.

The extra grapes were immensely popular.  I'm pretty sure a few people had the equivalent of a full drink in grapes.  I'm not judging.  I might have been encouraging it.  They also went really well with the fruit dip.

*****

Here are some other pictures from the show:

Naked Caprese Salad Skewers
Caprese Salad Skewers Dressed with Balsamic and Parmesan
Brie with Baby Heirlooms and Kalamatas
Salted Cucumbers with Mediterranean Feta Spread
Fruit Platter with Dip in a Mini-Watermelon
Spinach-Artichoke Dip with Parmesan
*****

I'll go over some of the other items later, but for now, I am going to finally go finish drying and putting away all the serving pieces and then take an evening off!  It is so close to being Pool Time in AZ that I can smell it.

Happy Weekend!

Friday, March 23, 2012

Baked Artichoke Wontons, Julia Meet Julia, and Move It

I'm cooking for three parties this weekend...  two of which are within 6 hours of each other on Saturday.  All of them are quite small events, probably 15 or so people.  ((It's funny of how my idea of small has changed--  a couple of years ago the idea of cooking for 15 would have scared me.  Now 75 doesn't even give me pause.))  The first of the three was yesterday and for the appetizer, we had Baked Artichoke Wontons.

Appetizers are notorious for being fat-bombs...  It seems everything that is typically available is either fried, dripping with cheese, or fried and dripping with cheese.  The default alternative is usually a veggie tray that gets completely ignored.  These are a good alternative and they look like you really did something, when actually they are pretty easy.

What you need:

EVOO  ((That's extra virgin olive oil to you))
24 round wonton wrappers ((you can find these in the produce section of the grocery store typically))
1 14 oz can of artichoke hearts in water, drained and coarsely chopped
1/2 medium red bell pepper, diced
2 oz mozzarella cheese, grated  ((like a handful))
1 oz Parmesan cheese, grated  ((like half a handful))
1 lemon  ((for zest... don't be scared, hang on))
2 tbsp fresh parsley, finely chopped
1/4 cup fat-free mayo
1 garlic clove, pressed

Do it:

Preheat the oven to 350.

Take the wonton wrappers and brush them lightly with olive oil using a basting brush on one side.  Place the wrapper into a mini muffin tip, pressing it down into the cup part evenly with the oiled side up.  Bake for 6 minutes or just until edges turn a light golden brown.  Remove to a rack.

In a large-ish bowl, combine the artichoke hearts, red pepper, mozzarella, Parmesan, parsley, mayo, and garlic.  Zest a little bit of lemon over the top, maybe 1/4 of a teaspoon is all you need.  ((TIP:  I've done this.  I've seen other people do it.  To zest a lemon, just take a very fine grater or microplaner and run it LIGHTLY over the outside of the lemon.  You want the yellow stuff, NOT the white stuff.  The white stuff is bitter and will make whatever you are scraping it on taste horrible.  Use a light touch and a little goes a long way.))  Combine well.  ((I made this concoction ahead of time and refrigerated it for about two hours.  I think it turned out better than the time I did it immediately before, but I have a bias that I think everything is better after it sits for a while so there you have it.))

Using a spoon, add a small scoop to each of the wonton wrappers.  Sprinkle with a little more Parmesan.

Bake for 8 minutes or until edges are golden brown and the cheese is starting to melt. Remove from pan and serve immediately.

Not the greatest picture, but I was in a hurry.  Sorry.
I adapted this recipe very slightly from my pals at Pampered Chef.

Nutritional Info:  Win!  1 cup contains approximately 60 calories and 3 grams of fat.  Just don't eat the whole pan and you're good.

*****

Look at the great gift my friend Amy, aka the host of the party, got me!

I wonder if she ever went by Jules?
I can't wait to dig into both of these.  But not today...

Today is Operation Move Deb and Not Kill My Back or Anyone Else.  Moving is so fracking stressful, especially for someone with an obsessive-compulsive-clean-freak bent.  Add in that the movers will be there sometime after they finish their other job and no, they don't know when that is and hopefully they can get it all done today.  Argh.  I can already sense this is going to be a bit of a long day, especially because both Deb and I are morning people who would much rather get things going basically right NOW.  ((It's 5 am and I've been up for an hour.  This is not unusual.))  So anyway, wish me luck and post bail if necessary!

Friday, March 16, 2012

Hi, "My Drunk Kitchen," and Live Action Cooking

Just really quickly wanted to drop in and say hi, so "Hi!!!!"  ((Waves vigorously.))  That's another dumb joke that originated on FB that I no longer remember the details of.  I really should look into whatever that herb is that improves your memory but I can't remember what it is called.  Argh.

I'm off to do a party for ((I think)) 15 or 20.  And we are doing it LIVE.  Meaning, I am cooking there and people will theoretically be watching.  Don't tell the host or any of the guests, but I've never attempted any of the three dishes I am doing.  It is not terribly unusual for me to take things to events or serve things in my own home that I've never attempted before without an opportunity for a do-over, but typically then there are no witnesses to the various, "OH SHIT"'s, "Oh well"'s, and the "WHOOPS, eff it"'s.  This could be very entertaining.  I'll be sure to make the wine pours heavy just in case.  Someone should really take video.  It might look a lot like this:


Anyway, I'm making baked artichoke cups ((involves wonton wrappers which I predict I will have a terrible time separating, just a hunch)), three cheese roasted veggie pizzas, and a strawberry amaretto pastry.  We shall see how they turn out.

Wish me luck!